Every time Tom Brady is playing in a football🏈 game, I find myself excited to watch, lol. No lie, I’m a smidge obsessed with him because he’s so talented, and cute, and shows no signs of slowing down for his age.💪
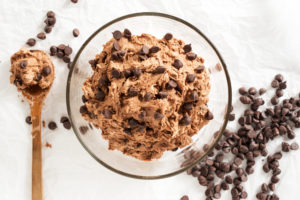
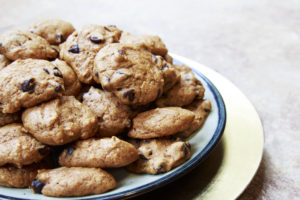
I’m all about anti-aging! So I made these chocolate chip cookies when Tom was playing (for Tampa) against his old team the Patriots (on October 3, 2021) and they turned out delicious! So I am affectionately naming them “Tom Brady Chocolate Chip Cookies.” Sam loves them so much he calls them the GOAT cookies, for “greatest of all time.” These are NOT for sale, these are for you to bake at home whenever the feeling strikes you. And if Tom should read this, YES I will mail you a dozen… actually I will hand deliver them if you want me to. 😜

Ingredients
2 sticks butter (1 cup) softened
1/3 cup evaporated (organic) cane sugar
1 cup lt golden brown sugar
2 eggs, large
2 TEA vanilla extract
1 TBSP grape seed oil
2 and 3/4 cup all-purpose flour
2 TEA cornstarch
1 TEA baking soda
1 TEA salt
1 TEA cocoa powder
1 cup chopped walnuts
1/4 cup mini semi-sweet chocolate chips
1 cup regular size milk chocolate chips (or chunks)
NOTE: Make sure the 2 eggs are room temperature when baking these cookies, they should not be cold. You can warm them on the counter for about 10 minutes at room temperature before adding them to the batter you’re making. Also, do not preheat your oven because the dough should be chilled before you bake these.
You should chill the dough for at least an hour, preferably 2 hours before cooking and you can even chill it overnight. For that matter, this cookie dough can be made in advance and frozen until ready to use (but you will need to increase baking time if you take it right out of the freezer and try to bake it! Just keep that in mind).  Directions
Don’t preheat your oven just make the cookie batter like this:
In a large mixing bowl or a stand-up mixer like a Kitchen Aid or equivalent, “cream” the butter and 2 types of sugar together until smooth for about 2 minutes. Add the oil, and one egg at a time and continue mixing together. Stir in the vanilla extract. (I have substituted ONE of the 2 teaspoons of vanilla for almond extract and that was great too!) Set aside.
Whisk together the flour, cornstarch, soda, salt, and baking powder in another mixing bowl. (There is NO baking soda in this recipe). Also, one quick thing, don’t ‘pack’ your flour in the measuring cup, just use the amount called for… but do not pack it down (like you would brown sugar) because that could ruin the ratio of everything.
Spoon it into your measuring cup gently, and level it to get an accurate amount of flour. Once these dry ingredients are whisked and uniform, you are ready for the next step which is to combine everything.
Mix the dry ingredients with the wet ingredients and stir very well. The batter will be thick. I sometimes have gloves on and will just dig in with my hands and combine everything perfectly. I only do this when I’m not using my stand-up mixer.
Add the walnuts and chocolate chips and stir well. This usually slows down my Kitchen Aid, but I still use it and just use a spatula to continuously get everything off the mixing blade. Any way you do it will be fine, just make your dough as uniform as possible without over-mixing it, and then cover and refrigerate to chill the dough for a couple of hours (or preferably overnight).
When ready to bake, heat the oven to 325 degrees and spoon about 1.5 to 2 TBSP of dough onto the cookie sheet lined with parchment paper. Try to resist the urge to smooth or flatten these, just put the globs of dough onto the pan and when they bake they will look bakery-style, very pretty, and chunky (as opposed to them looking so uniform as if they were store-bought).
Bake for approximately 10 -11 minutes. Be careful, watch them towards the end and remove them from heat when the edges turn slightly brown. You do NOT want the top to brown, just the edges. They will look uncooked but that’s okay, take them out. Let them rest on the hot cookie sheet for an additional 2 – 3 minutes, this allows them to settle and continue cooking through the center.
At this point, you can put them on a wire cooling rack for another 3 to 5 minutes, or a serving tray. Every oven is different so these are approximations. Furthermore, if you are cooking the dough that is still cold from the refrigerator (vs. warmed to room temperature), you will need a little more time. Keep in mind the only way to ruin these cookies is to overbake them!

If you like this recipe, try out my delicious Pumpkin Chocolate Chip Cookie Recipe.

Suzy Cohen, has been a licensed pharmacist for over 30 years and believes the best approach to chronic illness is a combination of natural medicine and conventional. She founded her own dietary supplement company specializing in custom-formulas, some of which have patents. With a special focus on functional medicine, thyroid health and drug nutrient depletion, Suzy is the author of several related books including Thyroid Healthy, Drug Muggers, Diabetes Without Drugs, and a nationally syndicated column.
